Command Outdoor Light Clips Review: Hang Lights Without Nails (2026)
Quick answer
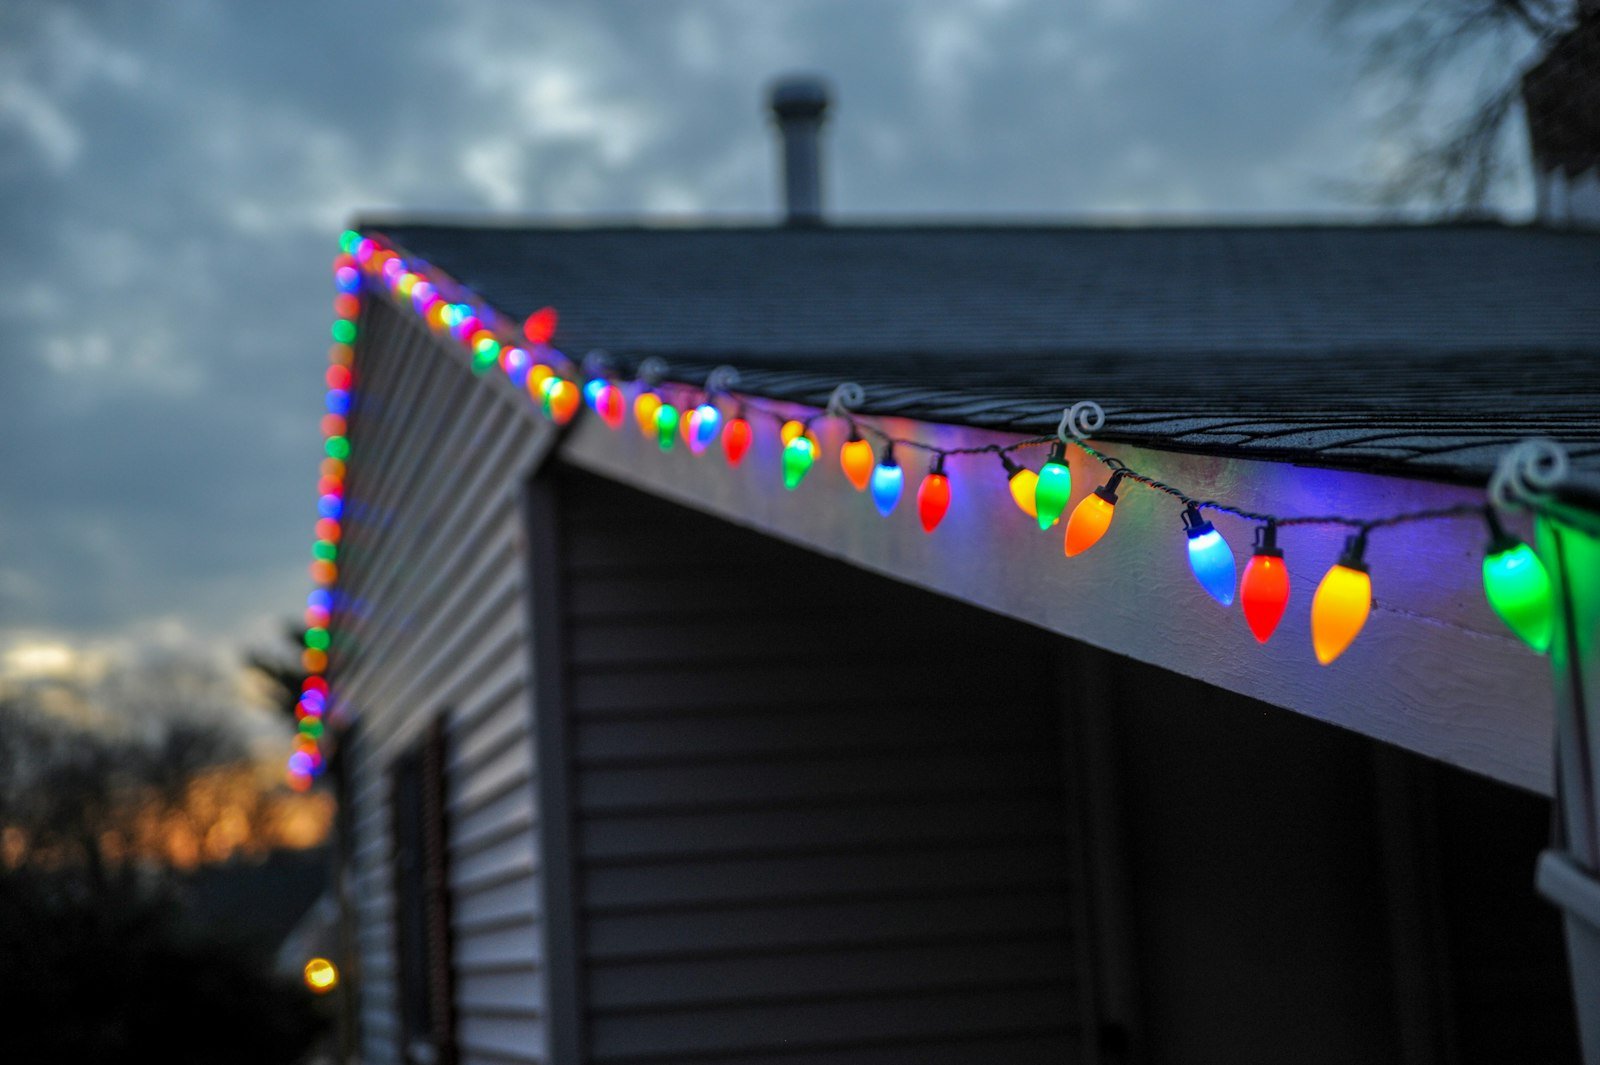
Command outdoor light clips are a good pick if you want to hang Christmas or patio string lights on smooth surfaces without nails, staples or a drill. One pack has 20 clear clips and 24 weather-resistant strips, enough for about 40 feet of lights at the suggested one clip per two feet. They are rated for 15°F to 125°F and stick to vinyl siding, soffits, doors, windows, finished fences, tile and painted cinder block. Skip them for brick, stucco-like cement board or rough wood.
Disclosure: As an Amazon Associate I earn from qualifying purchases.
Best for: Renters, homes with vinyl siding, porch rails, windows, doors and patio string lights
Check current price on Amazon →
Every December the same question comes up on porches across the country: how do you get a strand of lights to sit straight along the gutter line or the porch rail without putting a fresh row of holes in the house? Renters cannot use nails at all. Command outdoor light clips are 3M’s answer, and they are one of the most popular holiday hanging products on Amazon. Below: what the listing promises, where the clips hold, how to install them so they last all winter, and how they compare with gutter clips, cup hooks and staples.
Disclosure: As an Amazon Associate, team5e earns from qualifying purchases. If you buy through our links we may earn a small commission at no extra cost to you. Prices and availability change often, so check Amazon for the current price. Learn more.
Command outdoor light clips at a glance
This is a pack of small, clear plastic hooks, each mounted on a removable adhesive strip made for outdoor use. You press the strip to a clean, smooth surface, wait an hour, then drop the light wire into the open hook. When the season ends, you pull the strip's tab straight down and it releases without tools. The pack covered here includes 20 clear clips and 24 strips, so you get four spares for re-hanging a clip that ends up in the wrong spot. The clear plastic disappears against white trim and light siding, which matters on a house you see in daylight for weeks.
| Pick | Best for | Why it stands out | |
|---|---|---|---|
| Command Outdoor Light Clips, Clear (20 clips, 24 strips) Best No-Nail Light Hanger | Renters, vinyl siding, porch rails, windows and doors | Water and UV resistant, 15°F to 125°F, removes without holes | See photos |
Our verdict on these outdoor light clips
For smooth exterior surfaces, Command outdoor light clips are the easiest damage-free way to run a strand of string lights. They go up in minutes, hold through rain and snow according to the listing, and come off at the end of the season with nothing to patch. They are not a fix for every house, though: textured brick, rough wood and cement board are on the do-not-use list, and you need to plan a clip every two feet, so a long roofline takes several packs.
1. Command Outdoor Light Clips, Clear (20 clips): Best No-Nail Light Hanger
The main reason to buy Command outdoor light clips is that they replace the hammer. Each clip rides on a Command strip designed for the outdoors, and the listing says the strips are water and UV resistant and hold through rain, snow, sleet and heat. You clean the spot with a dry cloth, press the strip on, give it an hour to bond, and then the light wire simply sits in the hook. Nothing is screwed, nailed or stapled, which keeps your siding, trim and lease deposit intact.
The second reason is flexibility. The clips are not just for the roofline. The listing names doors, flat vinyl siding, soffits, finished fences, tile, painted cinder block and windows, and they work indoors on smooth walls too. That opens up ideas like outlining a front window, running lights along a porch rail, or framing a patio slider, all with the same pack. Clear plastic keeps the clips nearly invisible, so the house still looks tidy in daylight.
- No nails, staples or tools; removes cleanly with a downward pull
- Water and UV resistant, rated from 15°F to 125°F
- Works on vinyl siding, soffits, windows, doors and finished fences
- Clear plastic blends into white trim and light siding
- Four spare strips in the pack for re-positioning
- Not for brick, cement board or rough-sawn wood
- One clip per two feet means about 40 feet of lights per pack
- Must be installed above 15°F and left for an hour before loading
Best for: Renters, homes with vinyl siding, porch rails, windows, doors and patio string lights
See photos & price on Amazon →
Command outdoor light clips specs from the listing
Everything in this table comes from the Amazon listing for the clear 20-clip pack of Command outdoor light clips. 3M sells other counts and versions (including rope light clips), so check the pack size before you order.
| Spec | Listing detail |
|---|---|
| Brand | Command (3M) |
| Type | Adhesive outdoor light clip with removable strips |
| In the pack | 20 clear clips, 24 small water-resistant strips |
| Spacing | One clip for every 2 feet of lights |
| Coverage per pack | About 40 feet of lights (20 clips x 2 ft) |
| Weather | Water and UV resistant; rain, snow, sleet and heat |
| Temperature range | Holds between 15°F and 125°F |
| Surfaces | Doors, flat vinyl siding, soffits, finished fences, tile, painted cinder block, windows |
| Not recommended | Brick, cement board, rough-sawn wood; valuable or irreplaceable items |
| Prep and wait time | Clean with a dry cloth; wait 1 hour before hanging lights |
| Color | Clear |
Why the one-clip-per-two-feet rule matters
The spacing is not just a suggestion for looks. Spreading the load across many clips means no single strip carries much of the strand, and the wire stays in a neat line instead of drooping between points. Before you buy, measure the run with a tape (or count siding boards), divide by two, and round up. A 30 foot porch roof needs 15 clips; a 60 foot roofline needs 30, so two packs.
Who should buy them (and who should skip them)
Buy them if you:
- Rent and cannot put nails or screws into siding or trim
- Have vinyl siding, smooth painted trim or soffits along the roofline
- Want to outline windows, a front door or a porch rail with lights
- Hang patio or bistro string lights on a finished fence or smooth wall
- Prefer a tidy, almost invisible hanger you can remove after the holidays
Skip them if you:
- Have brick, stone, stucco-style cement board or rough cedar where lights will go
- Need to clip lights to the gutter lip or shingles (gutter and shingle clips do that better)
- Plan to install on a day well below 15°F
- Want to hang heavy items like big wreaths, signs or inflatables from the same hooks
How to use Command light clips step by step
Knowing how to use Command light clips properly is the difference between a strand that stays put until January and one that drops on the first freezing night. When Command outdoor light clips fail, it is usually because of dust, cold or a rushed bond, not the strips themselves. Here is the process we would follow, based on the listing's instructions plus general adhesive know-how.
- Plan the run. Lay the lights on the ground below the spot, plug them in to check every bulb, and find the outlet end so you start the clips where the plug needs to land.
- Mark the spacing. Use painter's tape or a pencil dot every 2 feet. On vinyl siding, the overlapping boards make a handy level line.
- Clean the surface. The listing says to wipe with a dry cloth to remove dirt and debris. If there is grime or pollen film, wipe with a little rubbing alcohol first and let it dry fully. Avoid household cleaners that leave a slick residue.
- Check the temperature. Install on a day inside the 15°F to 125°F range; a mild, dry afternoon is ideal. Cold, damp strips grip poorly.
- Press and hold. Peel the liner, place the strip, then press firmly over the whole strip for about 30 seconds.
- Wait one hour. The listing asks for an hour before you load the clips. Use the time to mark the next section.
- Drop the wire in. Lay the wire into each hook rather than tugging it sideways, and leave a little slack at corners so the strand is not pulling against the clips.
To take them down, pull the stretch tab slowly straight down along the wall, parallel to the surface, not out toward you. That is how Command strips are designed to release without lifting paint. Unused strips are worth keeping; the pack includes four spares. That is really all there is to how to use Command light clips: clean, press, wait, hang, and pull the tab down when you are done.
How to hang Christmas lights without nails
If you are figuring out how to hang Christmas lights without nails, the right hanger depends on where the lights go. Adhesive hangers like Command outdoor light clips handle the smooth vertical surfaces: siding, fascia boards with a smooth finish, soffits, window frames and door trim. For gutters and shingles, plastic all-in-one clips that slip over the gutter lip or under a shingle tab are the usual choice. Combining both is common: gutter clips across the eaves, adhesive clips down the corners and around the windows.
Roofline and soffits
A soffit line is one of the best places for Command outdoor light clips, because it is smooth, painted and partly sheltered from rain. Mount the clips on the face of the fascia or just under the soffit edge so the bulbs hang straight down. Keep every clip in a level line; even a half inch of wobble shows up at night.
Windows, doors and porch rails
Outlining a window or front door is where clear Command outdoor light clips really shine. Place a clip at each corner, then every two feet along the sides. On a painted porch rail, run the clips under the top rail so the wire is hidden and the bulbs glow just below it. For more ideas on dressing the entry, see our Christmas front door decor ideas and Christmas porch decor on a budget.
Ladder safety matters as much as the clips. Work with a helper, keep three points of contact, and never lean out past the rails. If the roofline is two stories, it may be worth comparing the cost of a pro install; our Christmas light installation cost guide breaks down typical prices.
See photos & price on Amazon →
Command light clips weight limit: what the listing says
People often search for the Command light clips weight limit before buying, and it is a fair worry. The listing for this pack does not state a weight in pounds per clip. What it does give is a usage rule: one clip for every two feet of lights. That rule is the real limit. Standard mini lights, LED strands and most C7 or C9 strings are light per foot, and spacing clips every two feet keeps the load on each strip small.
Where people get into trouble is asking the clips to do extra work. Do not hang a wreath, garland, sign or extension cord box from them, and do not let a heavy plug end dangle from a single clip; support it close to the outlet instead. The listing also says not to use the clips for valuable or irreplaceable items. If your lights are unusually heavy, such as a thick rope light, look at a clip designed for rope lights. Respecting the Command light clips weight limit and spacing is what keeps the strand from sagging by New Year's.
Command hooks for Christmas lights outdoor: which surfaces work
Not every Command product belongs outside. Regular indoor hooks and strips are not made for rain, sun and freezing nights, so when you shop for Command hooks for Christmas lights outdoor, look for packs labeled outdoor, like this one. The surface matters just as much as the product. Adhesive needs a smooth, solid, clean face to grip.
| Surface | Works? | Notes |
|---|---|---|
| Flat vinyl siding | Yes | Mount on the flat face of a board, not on a seam or the bottom lip |
| Painted soffit or smooth fascia | Yes | Sheltered spots hold best in wet weather |
| Windows and glass | Yes | Clean glass well; keep clips off the moving sash |
| Exterior doors | Yes | Place clips on the frame, not the swinging edge |
| Finished (painted or sealed) fence | Yes | Raw or weathered boards are a no |
| Tile, painted cinder block | Yes | Paint must be well bonded, not flaking |
| Brick, stone, stucco-like cement board | No | Too rough for the strip to bond |
| Rough-sawn wood, cedar shakes | No | Use screw-in cup hooks if allowed |
A quick test helps on any surface you are unsure about: stick one clip in a hidden spot, wait a day, then hang a short strand. If the strip lifts at the edges, choose another hanger. Using Command hooks for Christmas lights outdoor on the wrong surface is the most common reason they fall. The same no-hole approach works indoors; see how to hang fairy lights without nails in our fairy lights guide.
Pros and cons of Command outdoor light clips
The biggest plus of Command outdoor light clips is that they leave the house as you found it. No holes in vinyl, no staples in trim, no rust stains from nails. Setup takes minutes once the surface is clean, and the clear finish keeps the look clean in daylight. They also cover more than Christmas: patio string lights, a summer party, a dorm or apartment balcony.
The trade-offs are real. They depend on a smooth surface, they need a minimum temperature to install, and a long roofline takes several packs. They also do nothing for gutters or shingles, which is where many people start their lights. Think of them as one part of a hanging kit rather than the only tool.
Command outdoor light clips vs typical alternatives
| Option | Install | Damage | Best for |
|---|---|---|---|
| Adhesive outdoor light clips (these) | Press on, wait 1 hour | None on suitable surfaces | Siding, soffits, windows, doors, rails |
| Plastic gutter and shingle clips | Slip over gutter lip or under shingles | None if removed gently | Eaves and roof edges |
| Screw-in cup hooks | Drill and twist in | Small holes each year | Wood trim on owned homes |
| Nails or staples | Hammer or staple gun | Holes, can nick wires | Not recommended near wiring |
Staples are the one method to avoid: a staple driven over a light cord can pinch the insulation. Gutter clips are the natural partner to Command outdoor light clips, and for most homes the simplest answer to how to hang Christmas lights without nails is a mix of the two. If you have not picked your strands yet, start with our best outdoor Christmas lights buying guide, which covers LED, C9 and mini string options.
Care, removal and storage
Command outdoor light clips need little maintenance. Check the clips after a heavy storm or a big temperature swing and re-seat any wire that has slipped. When you take the lights down, remove the strips by the tab and toss them; strips are single-use, while the clear clips can be kept and reused with refill strips. Store the clips in a zip bag with the lights so next year starts faster.
What to check before buying
- Measure each run and divide by two to get the number of clips you need.
- Confirm the surface is smooth: vinyl, painted trim, glass, tile or finished wood.
- Check the forecast so you can install above 15°F on a dry day.
- Use outdoor-rated lights and an outdoor GFCI outlet or cord.
- Pick up gutter clips separately if lights will run along the gutter.
See photos & price on Amazon →
How we researched these outdoor light clips
We did not test Command outdoor light clips hands-on. We reviewed the Amazon listing details and instructions, the stated temperature range and approved surfaces, the brand's usage tips, and how popular the listing is. We compared them with other common ways to hang holiday lights and added general installation and safety know-how. We will update this review if the listing changes.
Helpful resources: NFPA: Winter holiday safety and NFPA: Electrical safety in the home.
Command outdoor light clips: frequently asked questions
Are Command outdoor light clips worth it?
Yes, if your lights go on smooth surfaces like vinyl siding, soffits, windows, doors or finished fences. They install without tools, hold in rain and snow according to the listing, and remove without holes. They are not worth it for brick or rough wood, where they will not bond.
How do you hang Christmas lights without nails?
Use adhesive outdoor light clips on smooth siding, trim, windows and doors, and slip-on plastic clips for gutters and shingles. Space clips about every two feet, clean the surface first, and install on a dry day above 15 degrees Fahrenheit.
What is the Command light clips weight limit?
The listing for this pack does not give a weight in pounds. Instead it says to use one clip for every two feet of lights, which keeps the load on each clip small. Do not hang wreaths, signs or valuable items from the clips.
How do you use Command light clips in cold weather?
Install them on a day between 15 and 125 degrees Fahrenheit, ideally a mild, dry afternoon. Clean the spot with a dry cloth, press each strip firmly for about 30 seconds, and wait one hour before hanging the lights.
Can you use Command hooks for Christmas lights outdoor on brick?
No. The listing says the clips are not recommended for rough surfaces such as brick, cement board or rough-sawn wood. For brick, look at clips made to grip mortar lines or ask your landlord about other hangers.
How many Command outdoor light clips do I need?
Measure the length of each run in feet and divide by two. A 20-clip pack covers about 40 feet of lights, so a 60 foot roofline needs about 30 clips, or two packs.
Do Command outdoor light clips damage paint or siding?
They are designed to remove cleanly. Pull the strip tab slowly straight down along the surface, not outward. Paint that is old, flaking or freshly applied can still lift, so test one clip in a hidden spot first.
Also Explore
Latest Posts
 Best Boot Tray for Winter (2026): 8 Picks for Snowy, Muddy Entryways
 Best Watch Winder for Automatic Watches (2026): 7 Quiet Picks and a Gift Guide for Him
 Best Ice Ball Maker for Whiskey: 8 Clear Picks (2026 Gift Guide)
 Best Luxury Hair Perfume for Women: 8 Designer Hair Mists Worth Gifting (2026)
 Best Garment Racks With Covers (2026): Rolling, Heavy-Duty and Dust-Proof Clothes Racks
 Best Tennis Bracelets on Amazon (2026): CZ, Moissanite and Lab-Grown Diamond Gifts for Her